Overview
Toolkit NuGet is a package manager for developers. It enables developers to consume toolkit related various features into their Asp.net Core MVC application / .Net Core Windows Forms application / .Net Core Console application. Here the code snippet examples documented based on Asp.net Core MVC application.
Visual studio code snippet for integration Nuget.
To register the toolkit handler middleware in program.cs, here is the code snippet
services.AddSingleton<IToolkitHandler, ToolkitHandler>();
To declare IToolkitHandler interface instance local object for accessing toolkit features.
private readonly IToolkitHandler _toolkitHandler;
To intialize the toolkit handler with the help of constructor dependency injection technique, here is the code snippet.
public YourClassConstructor(IToolkitHandler toolkitHandler)
{
_toolkitHandler = toolkitHandler;
}
To Initialize Request DTO object and calling the method whereever it is needed.
var initializeRequestDto = new InitializeRequestDto();
To Initialize Request DTO properties
These are the sample input values for initializeRequestDto object. You need to try with your actual values.
initializeRequestDto.SaveCredential = false;
initializeRequestDto.ResumeWithInvalidCache = false;
initializeRequestDto.MaximumSubmissionDocumentCount = 10;
initializeRequestDto.CachLookupDurationInHours = 24;
To call the nuget Initialize method, here passing initializeRequestDto as a input parameter. Once it is successfully initialized, your provided inputs related data will be saved in your sqlite local db.
var initializeResponseDto = await _toolkitHandler.Initialize(initializeRequestDto);
“For more details about the DTO object structure, check the code snippet here of the InitializeRequrestDto class”.
public class InitializeRequestDto
{
public bool? SaveCredential { get; set; }
public bool? ResumeWithInvalidCache { get; set; }
public float? CachLookupDurationInHours { get; set; }
public int? MaximumSubmissionDocumentCount { get; set; }
public RetentionScheduleDto? RetentionSchedule { get; set; }
public ScheduleDto? SubmitSchedule { get; set; }
public ScheduleDto? SyncSchedule { get; set; }
}
Note!
RetentionSchedule, SubmitSchedule and SyncSchedule background jobs could be configured but those are not supported by Nuget / CLI integrations. Mentioned background jobs are only supported by Docker container API.
Click here to understand more details about InitializeRequestDTO
Toolkit nuget method’s
Using toolkit nuget method’s, developer can understand more about each toolkit integrated method and its usage.
Click here to know more about toolkit nuget method’s
Downloadable source code for nuget integrated test tool
To configure the nuget test tool, Download the zip file and extract it to your desired windows location.
Here are the example screens to understand more about the Nuget integrated test tool each scenario.
To initialize the toolkit, developer may setup the toolkit as per their choice.
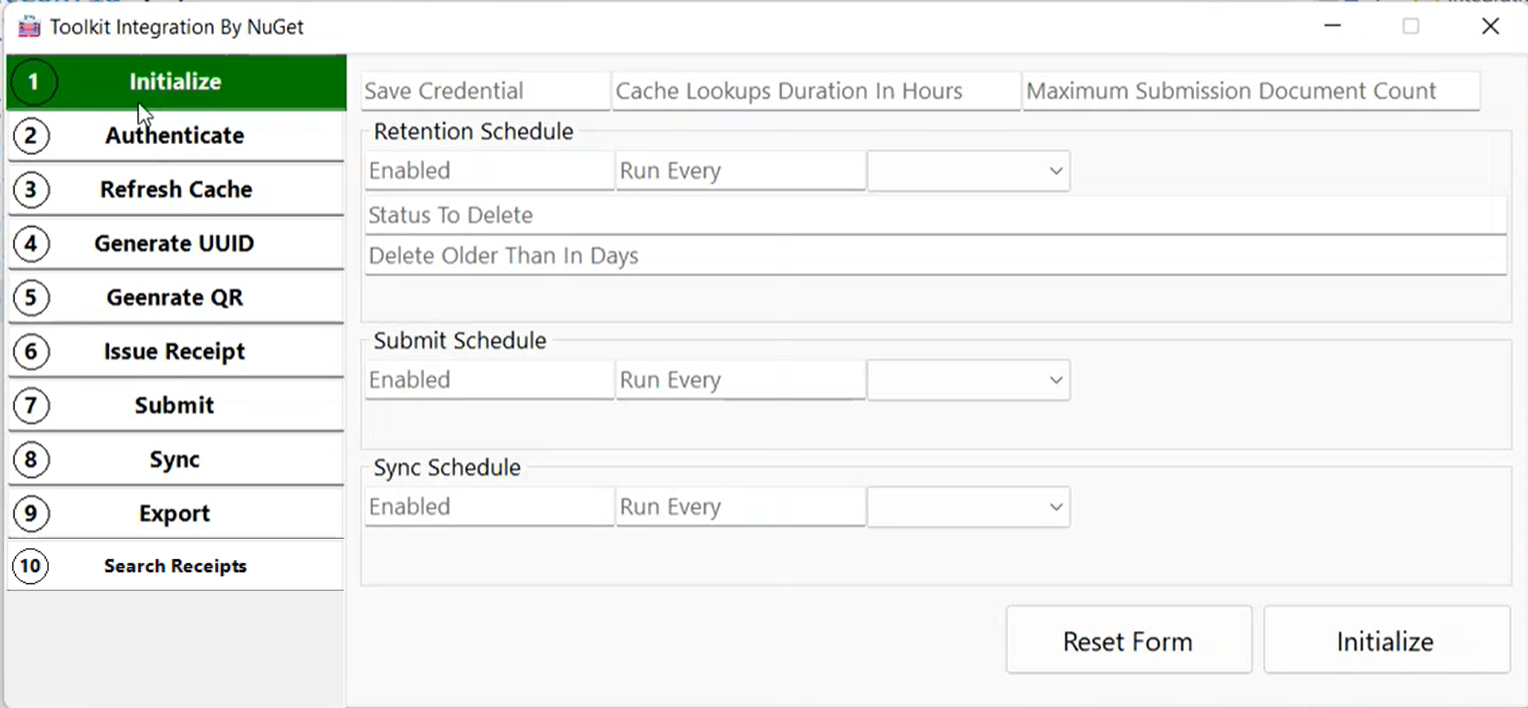
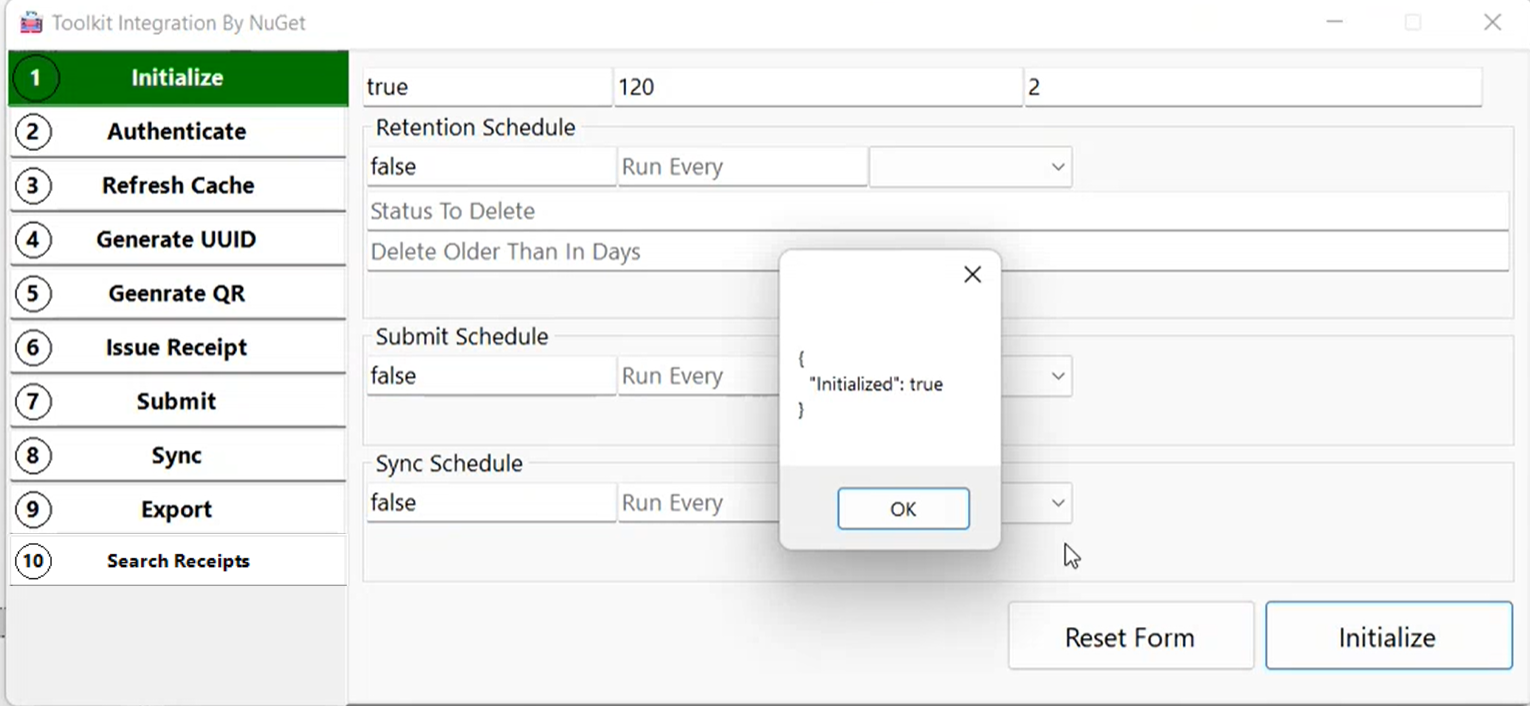
Toolkit will be initialized with the given details.
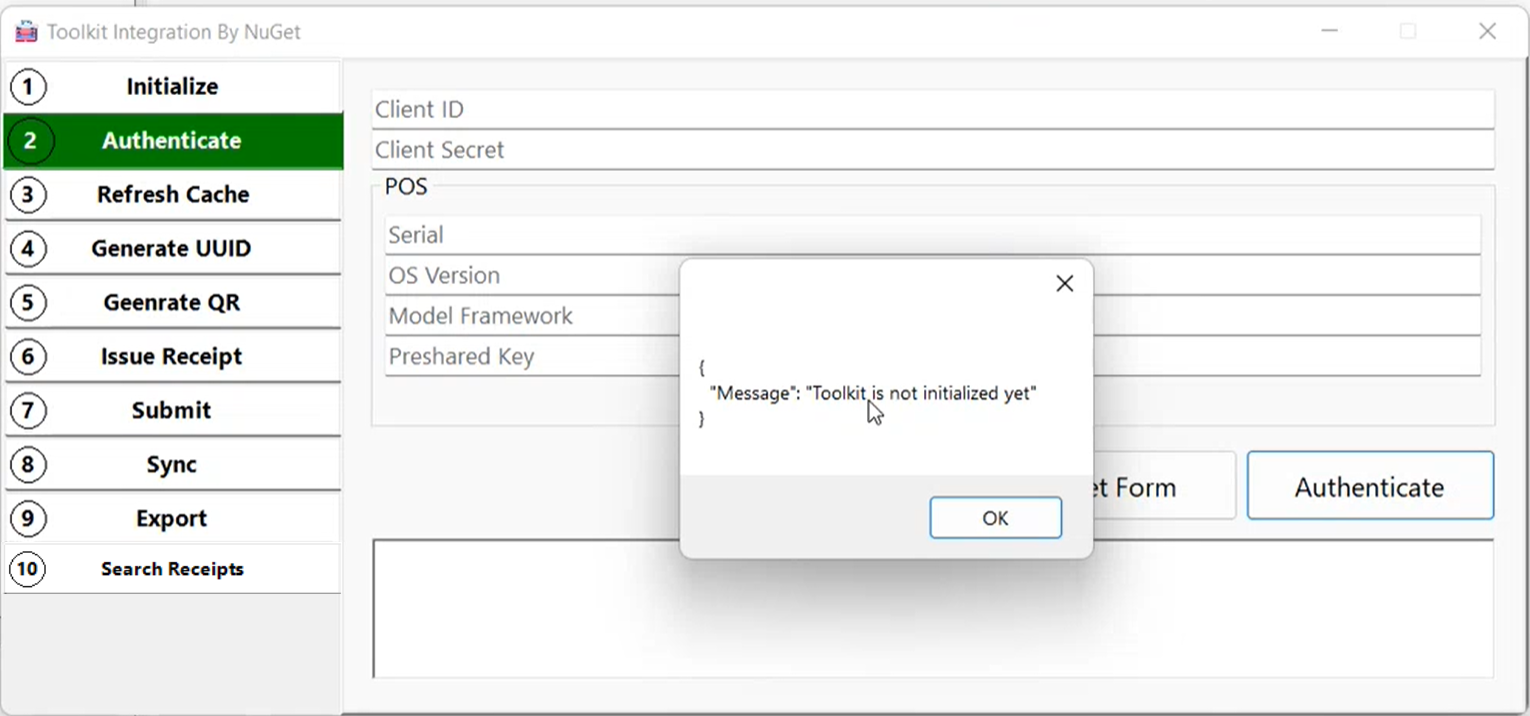
Without the Toolkit initialization, Authenticate will looks like as below.
“To authenticate the toolkit, user needs to provide the basic information”.
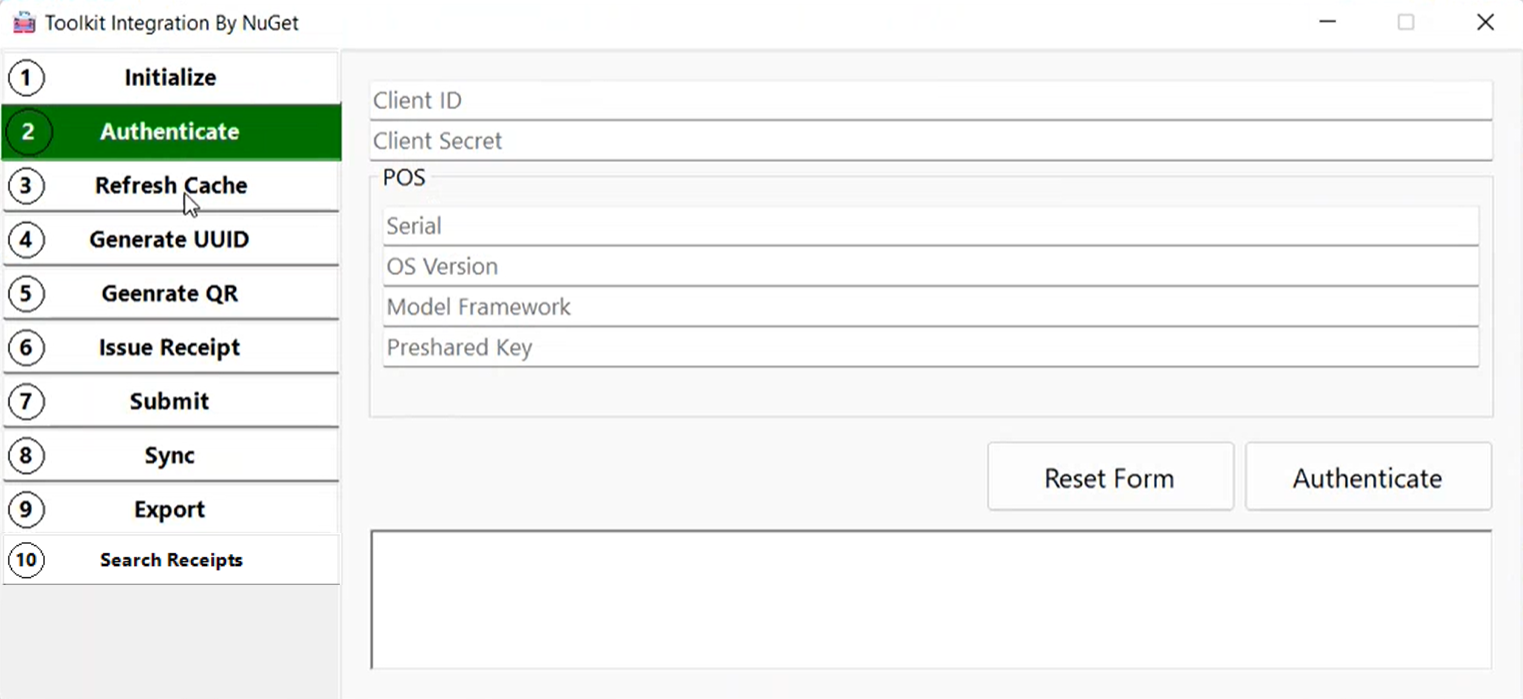
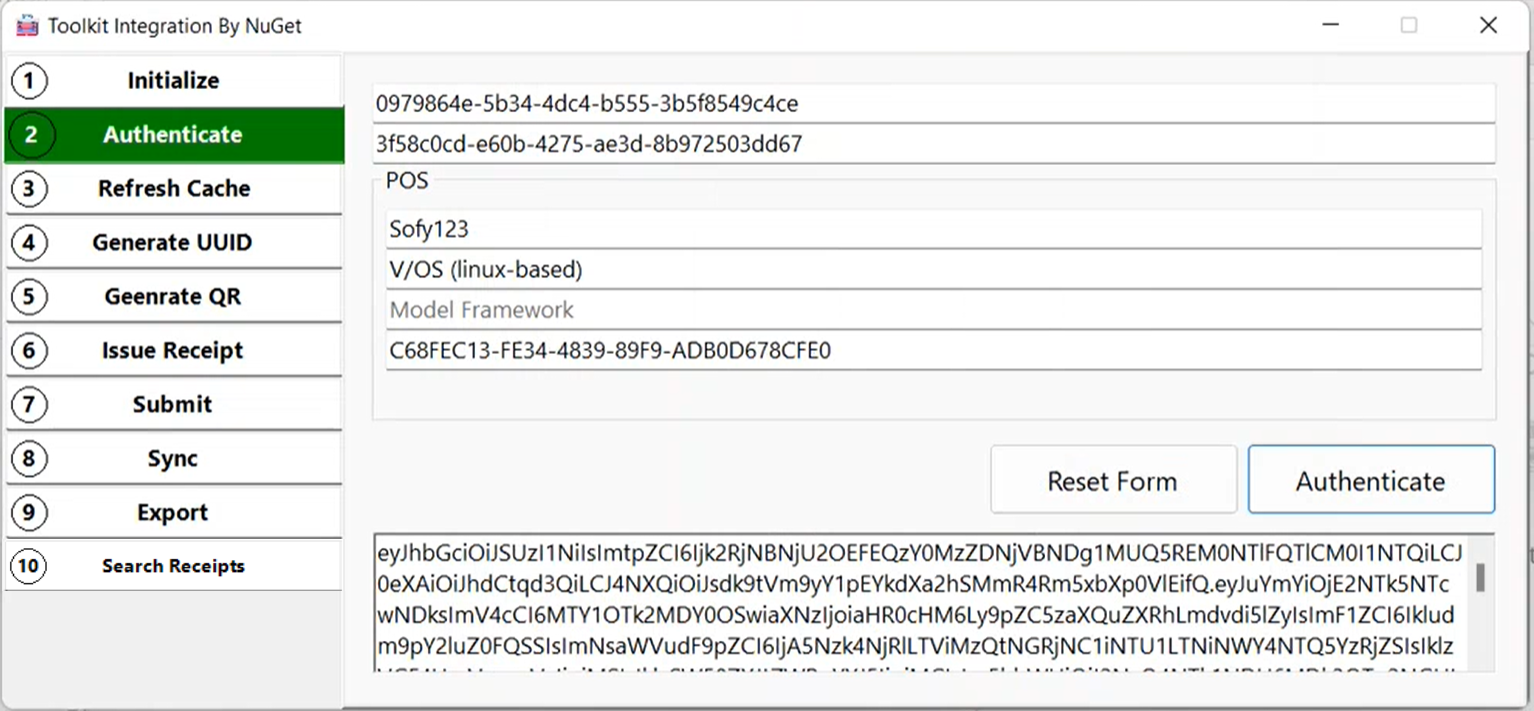
To authenticate a request, Call the toolkit Authenticate method and pass the AuthenticateRequestDto object whereever it is needed.
These are the sample input values for authenticateRequestDto object. You need to try with your actual values.
var authenticateRequestDto = new AuthenticateRequestDto
{
ClientId = "64645972-4318-4c50-8abb-66a401cbfecd",
ClientSecret = "b081618e-187d-478e-b4b9-c8602626bc22",
PosSerial = "1235648",
PosOsVersion = "Windows",
PosModelFramework = "",
PresharedKey = "1234567990"
};
To call the nuget aunthenticate method, here passing authenticateRequestDto as a input parameter
var respose = await _toolkitHandler.Authenticate(authenticateRequestDto);
Toolkit will be authenticated if the provided details are valid.
Upon clicking Refresh Local Cache button, it will refresh the local cache.
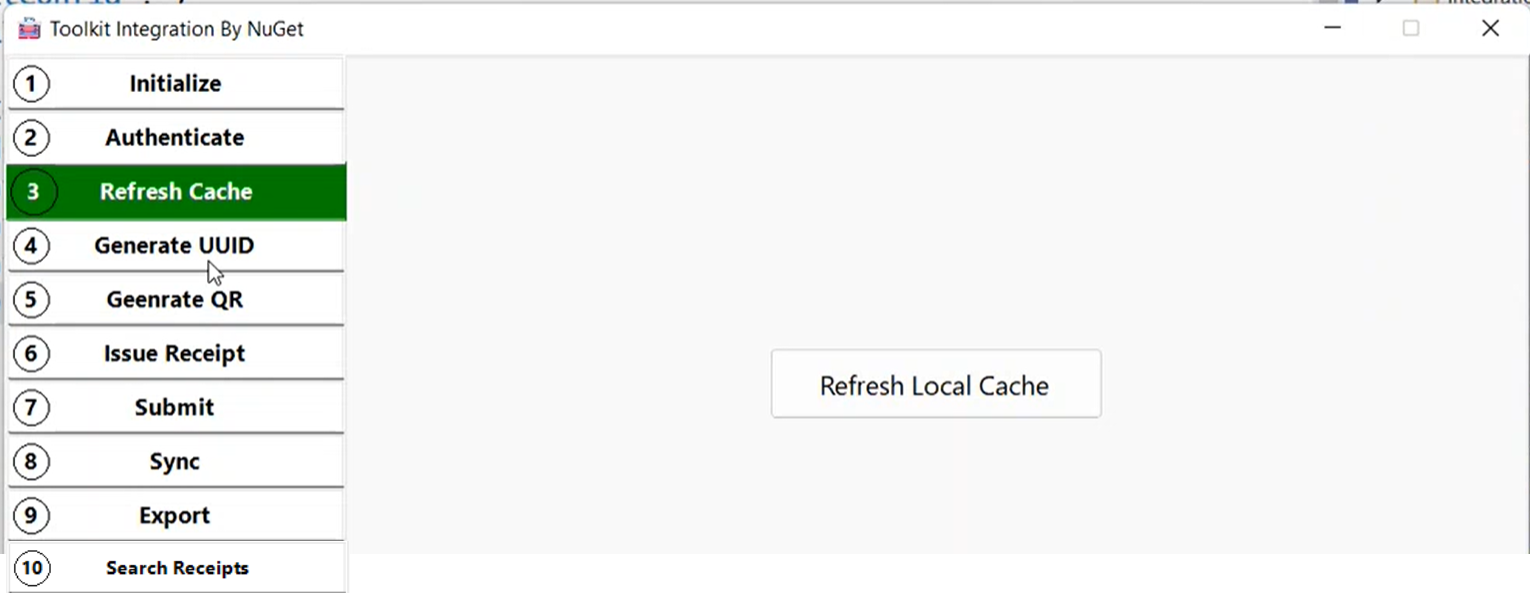
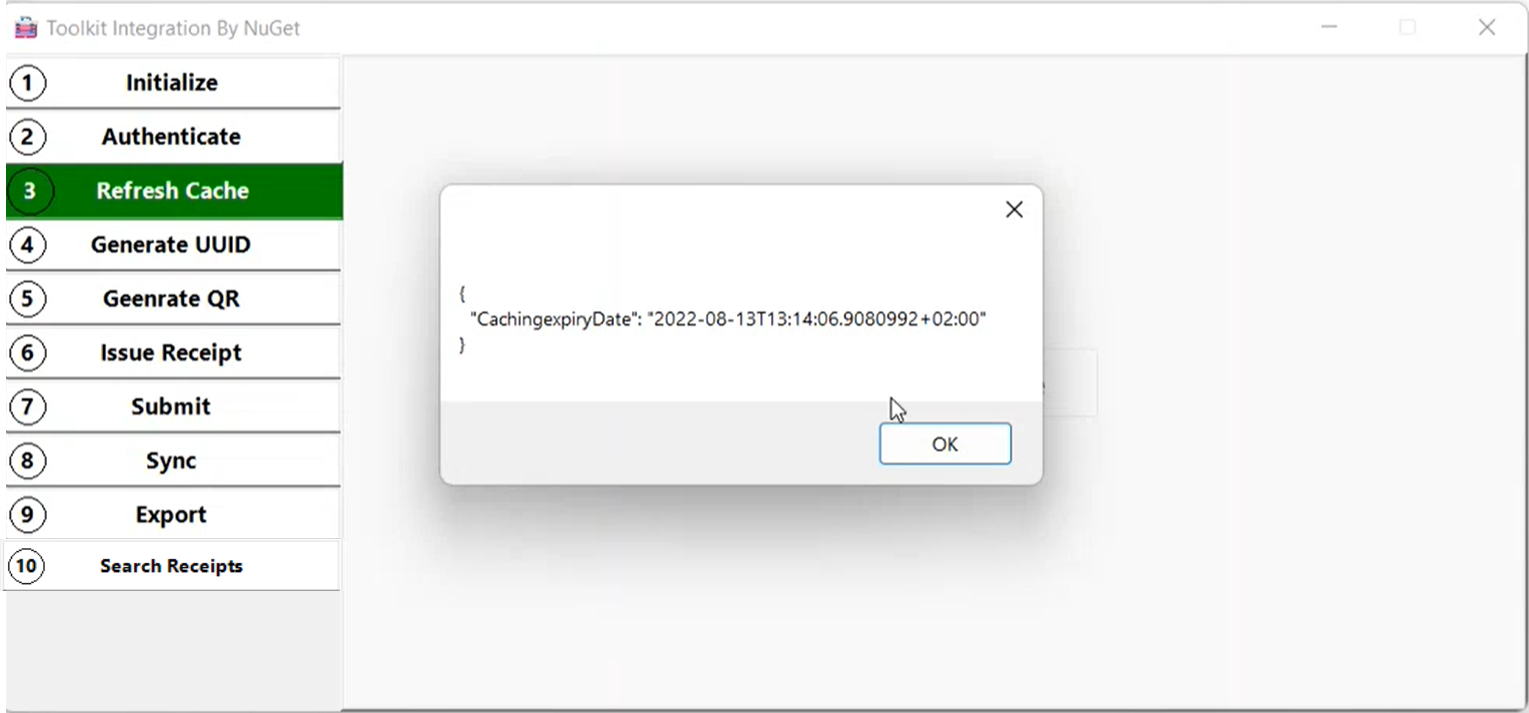
To refresh the local cache call the toolkit RefreshCache method.
var respose = await _toolkitHandler.RefreshCache();
Local cache will be refreshed and refreshed data will be persisted until the expiry date.
To generate the uuid, call the toolkit GenerateUuid method, you need to pass the complete receipt json content without the uuid value in input receipt json.
var response = await _toolkitHandler.GenerateUuid("__Receipt with out UUID json content__");
var updatedReceiptJson = response.UpdatedReceiptJson?.ToString();
UUID will be generated based on the given receipt/return receipt input json.
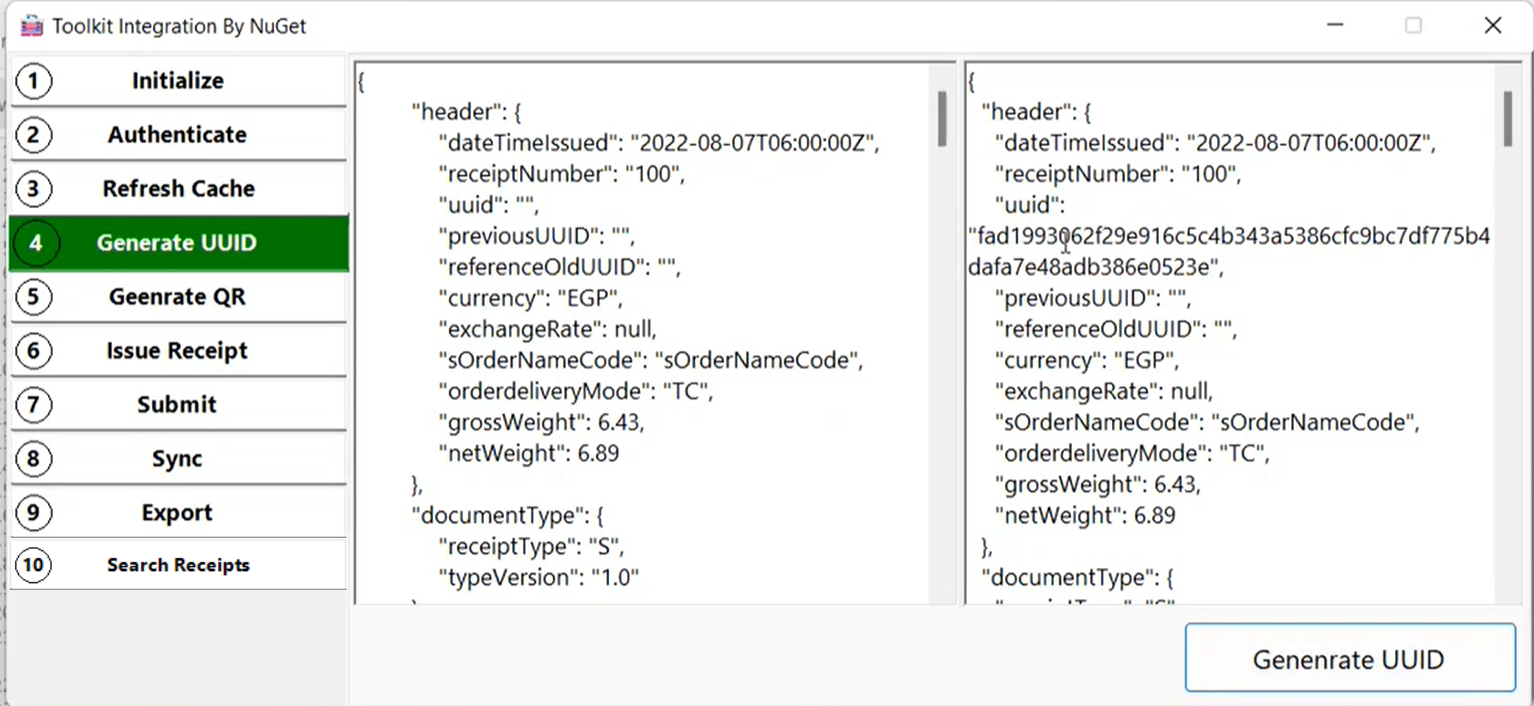
To generate the QR code, call the toolkit GenerateQrCode method, you need to pass the complete receipt json content along with the uuid value in input receipt json.
var response = await _toolkitHandler.GenerateQrCode("__Receipt with UUID json content__");
QR url and code will be generated based on the given receipt/return receipt input json.
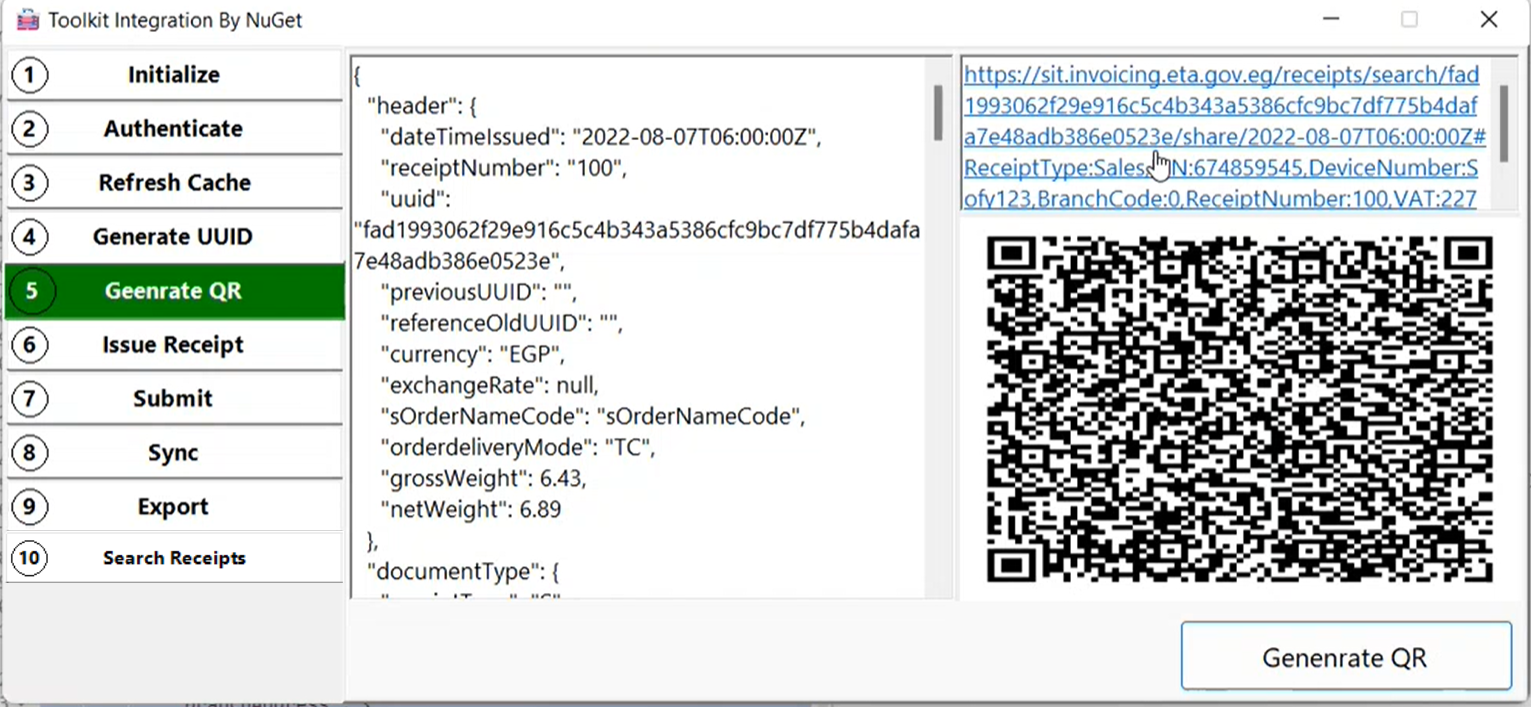
To Issue the receipt, here you need to call the IssueReceipt method with valid receipt input json as a parameter. It will issue the receipt and QR code will be generated. Generated QR code will be the output from this method.
var response = await _toolkitHandler.IssueReceipt("__Receipt json content__");
Receipt local validation will be performed and validation errors will be shown as follows.
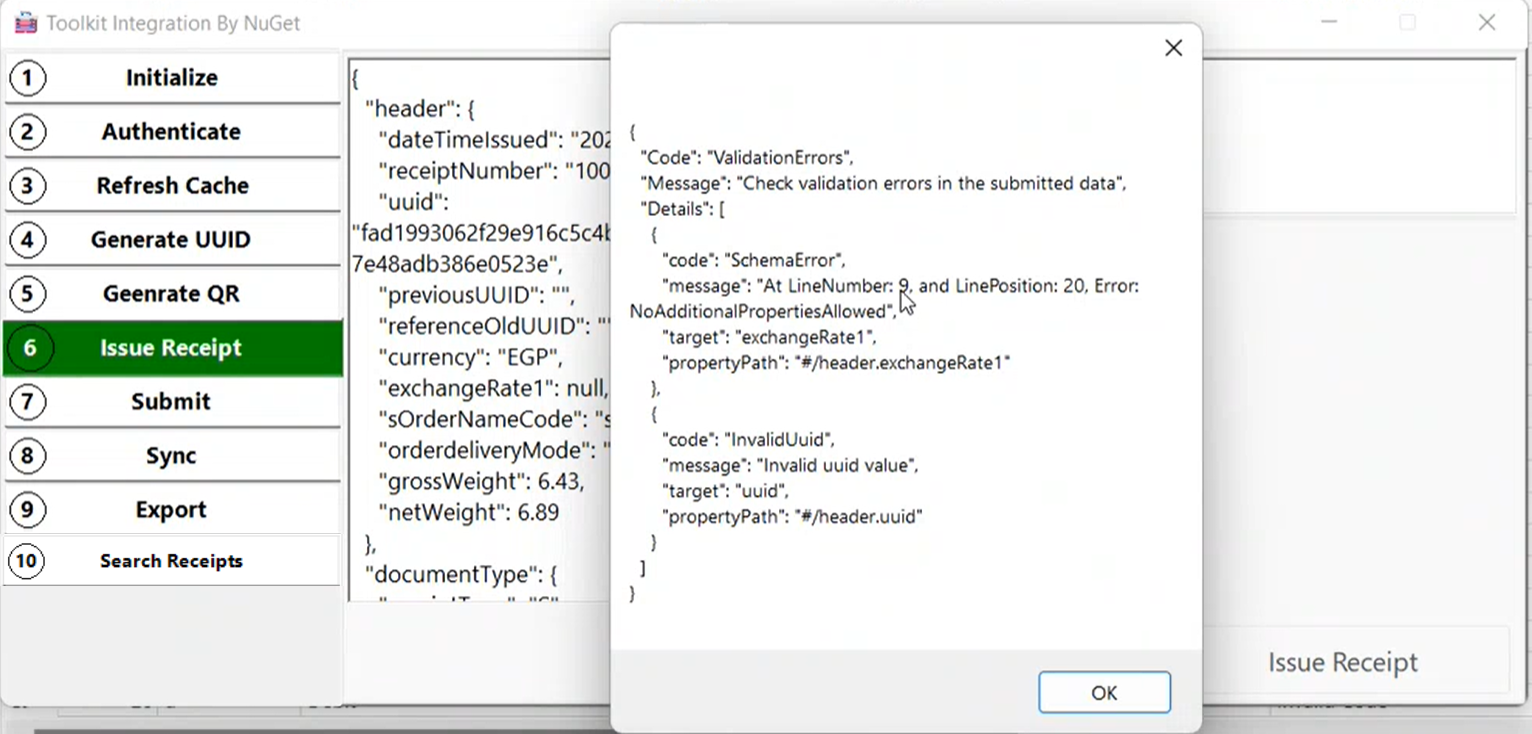
Receipt will be submitted locally based on valid receipt/return receipt data.
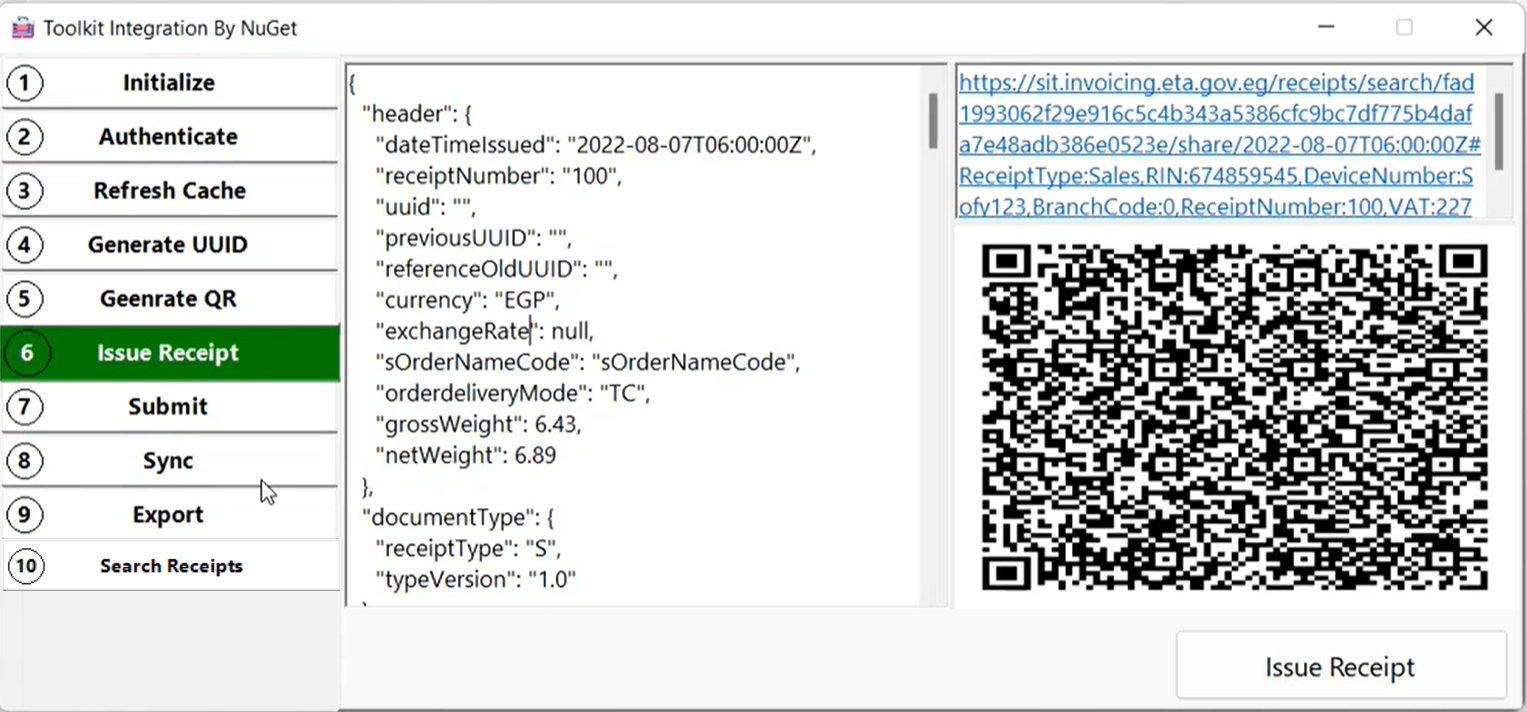
To Submit the receipt, here you need to set the SubmitReceiptsRequestDto and call the SubmitReceipts method with submitReceiptsRequestDto as a input parameter.
var submitReceiptsRequestDto = new SubmitReceiptsRequestDto
{
ReceiptCount = 5
};
var response = await _toolkitHandler.SubmitReceipts(submitReceiptsRequestDto);
Upon successful submission of local issued valid receipts, it will be shown as follows.
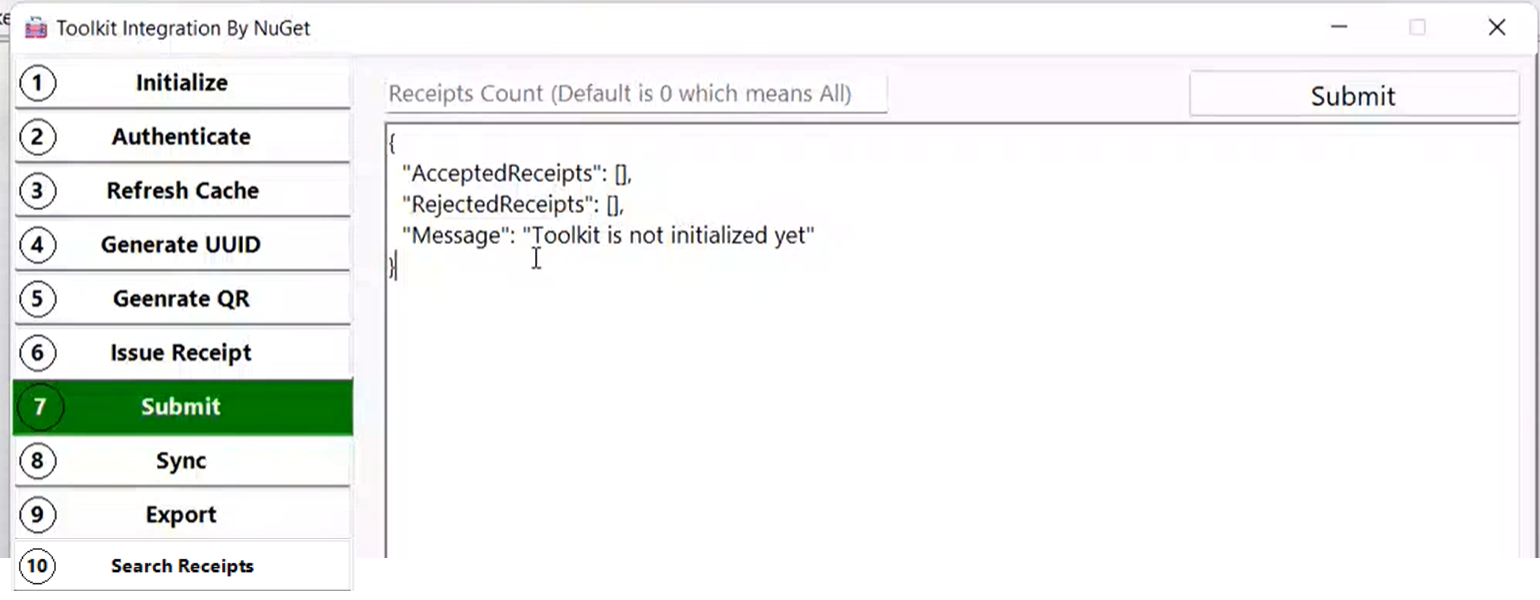
Upon clicking Sync button, it will sync the receipt status.
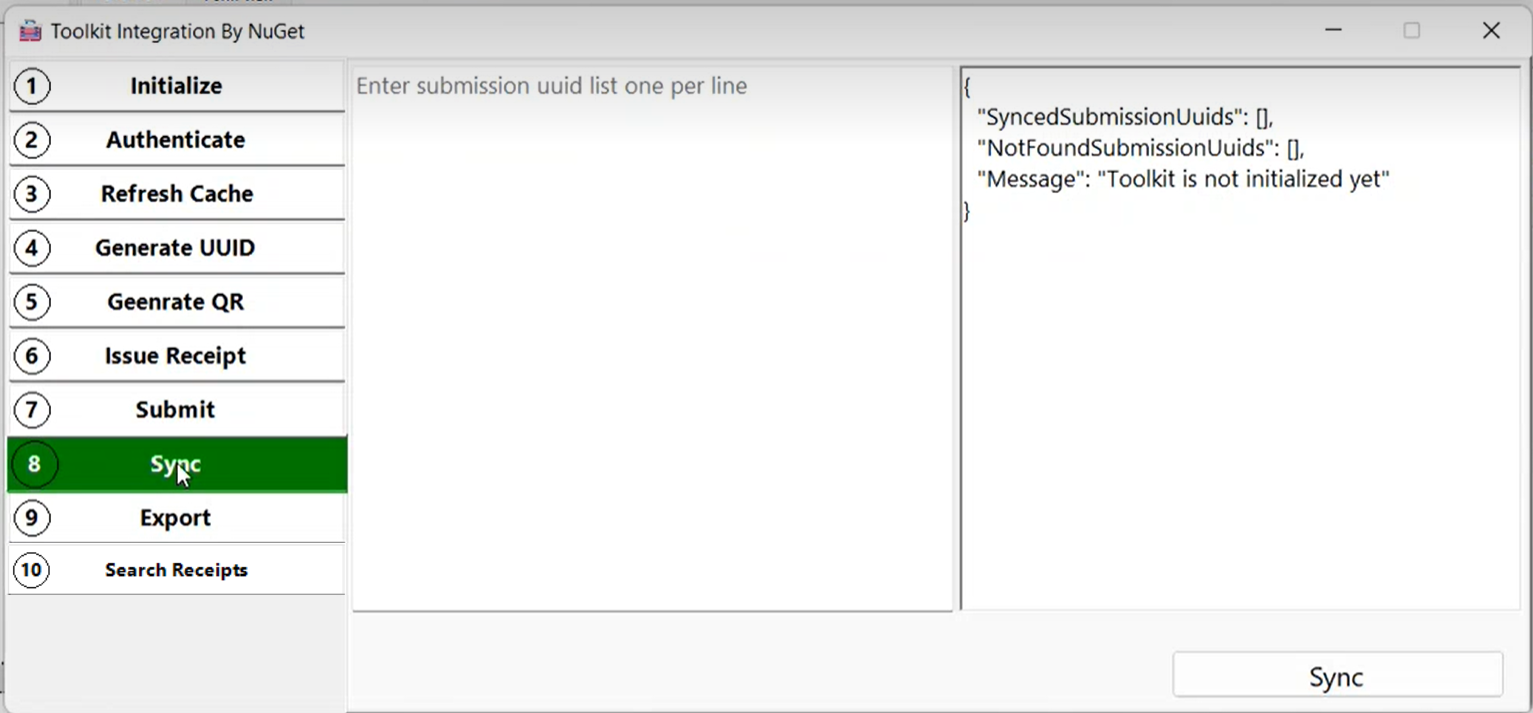
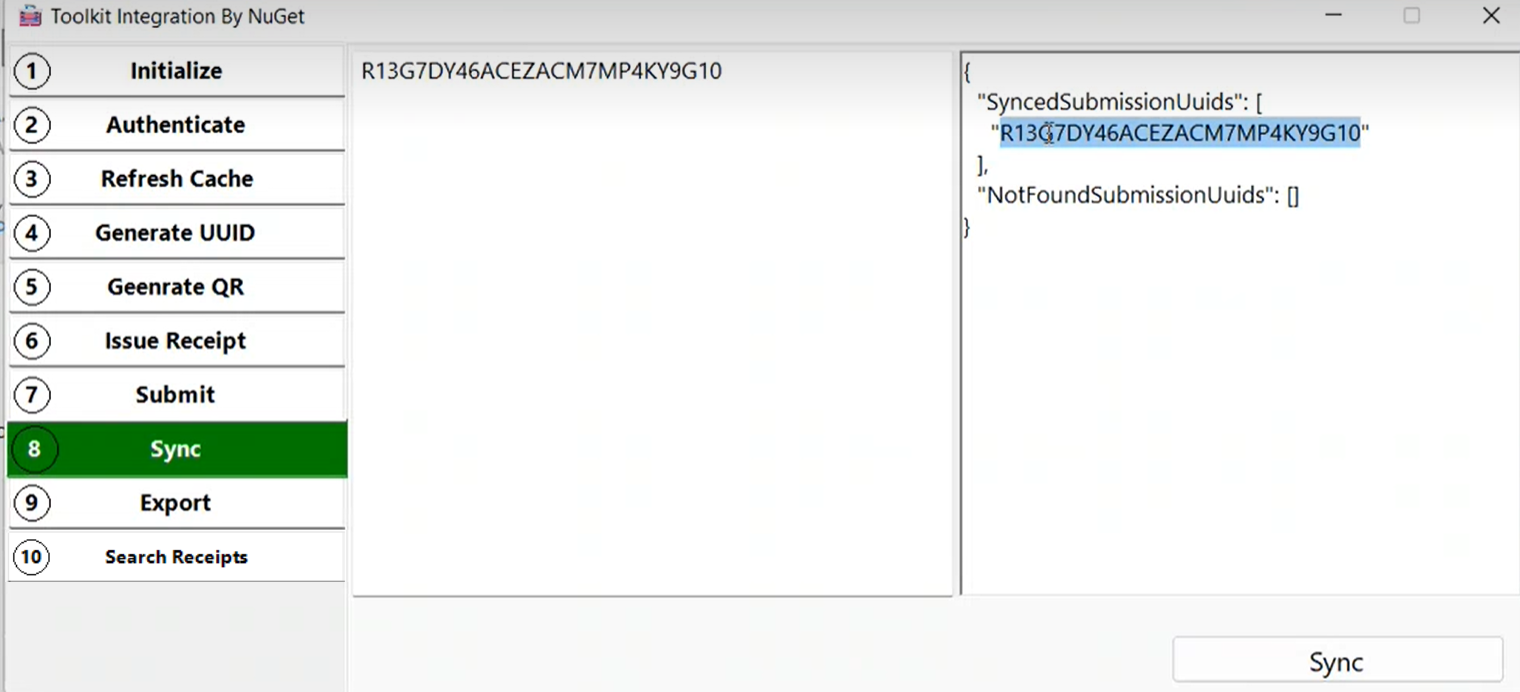
To Sync the receipt status, here you need to set the syncSubmissionRequestDto and call the SyncSubmission method with syncSubmissionRequestDto as a input parameter. Here you need to pass the submitted uuid’s status to be synched.
var submissionUuids = new List<string> { "966866a9-924f-4754-90e0-aec1a4456cc6", "9fa790fb-f564-4dd1-8b74-87365e53650e" };
var syncSubmissionRequestDto = new SyncSubmissionRequestDto
{
All = false,
SubmissionUuids = submissionUuids
};
var response = await _toolkitHandler.SyncSubmission(syncSubmissionRequestDto);
Receipts data will be synched both sides with the similar statuses.
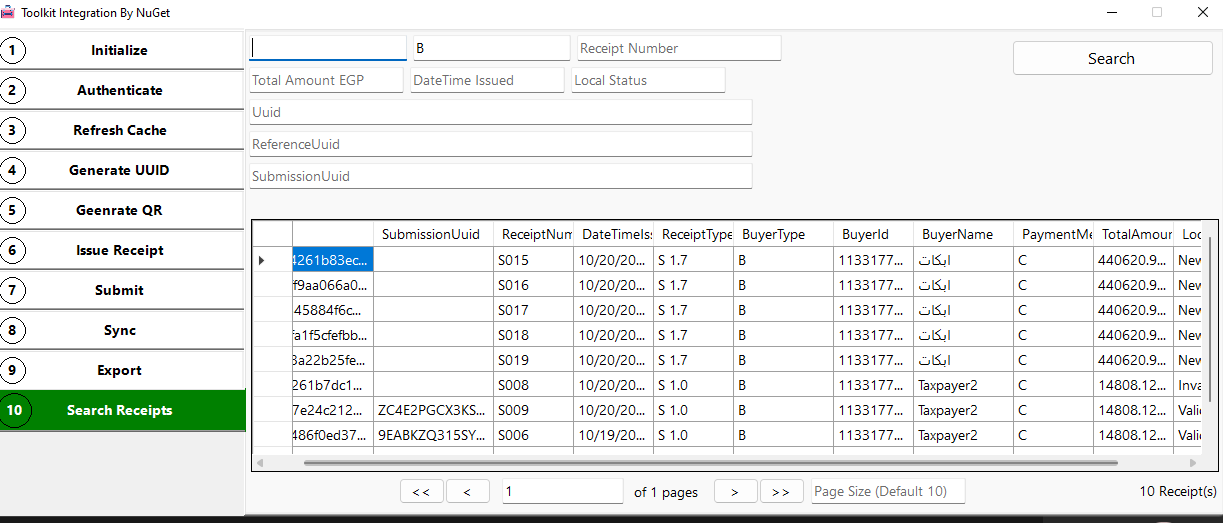
To search the receipts which are stored in local store by any of the search criteria or combination of search criteria, here you need to set the searchReceiptsRequestDto and call the SearchReceipts method with searchReceiptsRequestDto as a input parameter.
var searchReceiptsRequestDto = new SearchReceiptsRequestDto
{
BuyerId = buyerId,
BuyerType = buyerType,
ReceiptNumber = receiptNumber,
Uuid = uuid,
ReferenceUuid = referenceUuid,
SubmissionUuid = submissionUuid,
DateTimeIssued = DateTime.TryParse(dateTimeIssued, out var dateTimeIssuedValue) ? dateTimeIssuedValue : null,
LocalStatus = Enum.TryParse#60;ReceiptStatus>(localStatus, out var localStatusValue) ? localStatusValue : null,
TotalAmountEGP = decimal.TryParse(totalAmount, out var totalAmountValue) ? totalAmountValue : null,
PageNumber = pageNumber,
PageSize = pageSize
};
var result = await _toolkitHandler.SearchReceipts(searchReceiptsRequestDto);
Local store data will be fetched based on the given search criteria.
